@theamazingartofescapism asked me about how I draw hair. I’m sure I missed out heaps of stuff but in general this is how I approach it. Hope it’s helpful 😀
Drawing basic facial expressions is not the hardest. Most people can draw a sad face, a happy face, angry etc., but making more multidimensional expressions is more of a challenge. I have gotten a lot of compliments on how I draw facial expressions, (specifically “angsty ones”) telling me that they are very dramatic and well… expressive! And there are actually only a few things I think about when I draw faces that take them to the next level, so I thought i’d illustrate them all here!
SUPER IMPORTANT TIP BEFORE WE START: Look at your own face when you draw faces. Even making the face when you are drawing (you don’t even have to look at it), will give you some sense of how the face muscles pull and where things fold and stretch, because you can feel it. You are the best reference when it comes to facial expressions!
Angles
Draw the head in an angle that matches the expressions you want to make. It is not a requirement, but is going to add to the effect.
Symmetry vs asymmetry
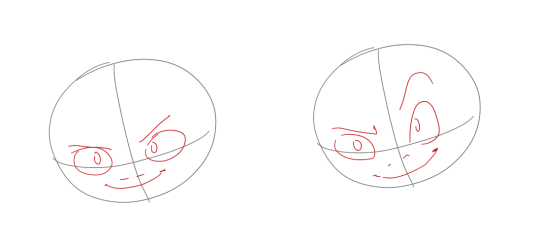
A face is rarely symmetric. Unless the face the character is making is 100 % relaxed or even dissociating, the eyebrows, mouth and facial muscles will have different placements of their respective side. This image shows the dramatic impact asymmetry has on a face:
That’s the difference between a smile and a smirk!
The first one’s like “oh yeah?” and the second is like “oH YEAH??”
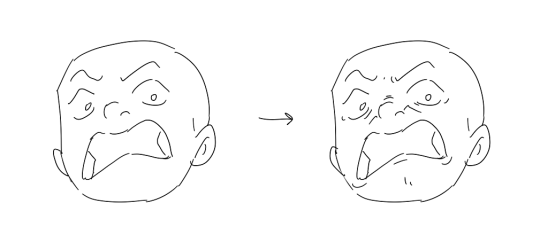
The “balloon squishing principle”
This is something I did subconsciously, and I didn’t know about until I made this tutorial. And this principle goes hand in hand with an asymmetric face. Basically, if you squish one part of the face, you need to even out the empty space by “inflating” the other part of the face so that it doesn’t appear shrunken. The picture hopefully explains it:
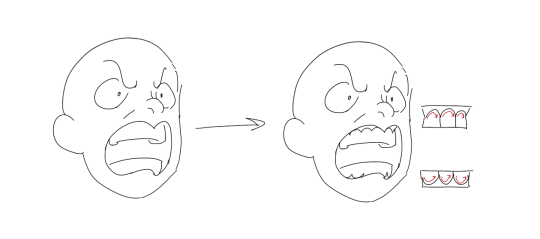
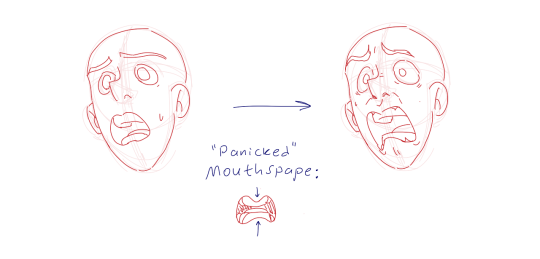
Teeth
Don’t forget to add the gum when the mouth is open to its full potential!
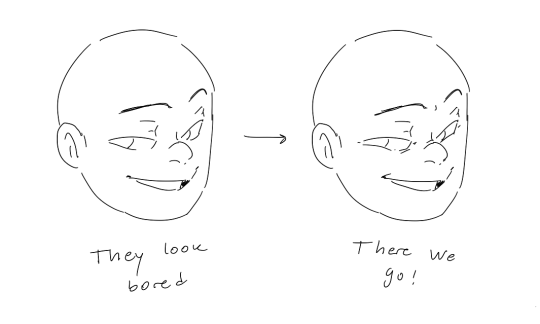
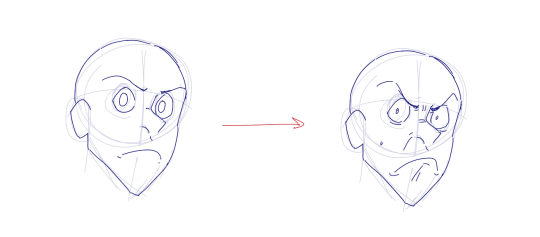
Squinting and folding
Adding folds around the eyes when a character is squinting makes a HUGE difference. It makes a smile more genuine and a growl more intimidating. Adding folds to the face in general makes your characters more lifelike and ‘visually relatable’. Like, they look human, and less plastic or fake.
and so on..
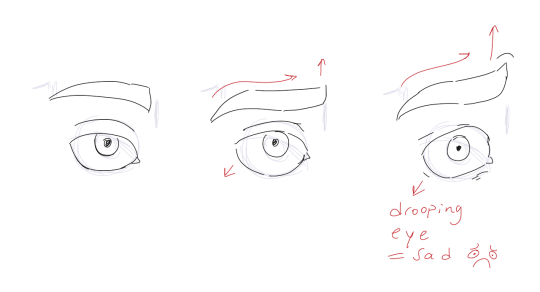
Pupils and irises
The placement of the iris and pupil in relation to the eyelids is very important! The less of the white you see, the more relaxed the character is.
And then of course eyebrows and eyes go hand in hand!
Gestures, spitting, sweating…
Adding more elements than just a face is key to making the character actually look like they are feeling what you want them to feel. Just the tiniest sweat drop adds to their anxiety, spitting adds frustration to their rage, slouching shoulders, waving hands, a double chin, extreme angles, the list goes on! Add whatever and see what kind of impact it makes! Does it do the trick? Great! Add it!
Over exaggeration!!
Remember that you can almost always exaggerate more. Don’t be afraid to do draw “too much” because you’re just experimenting. See what works and what doesn’t. What do you like to exaggerate?
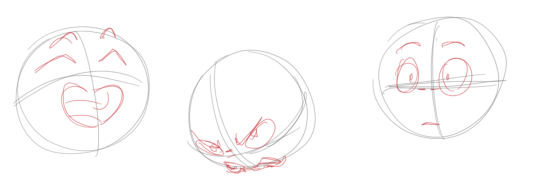
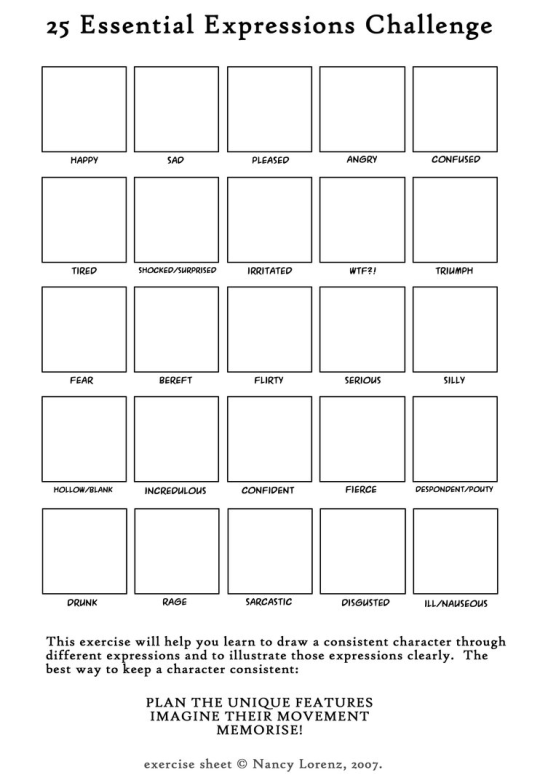
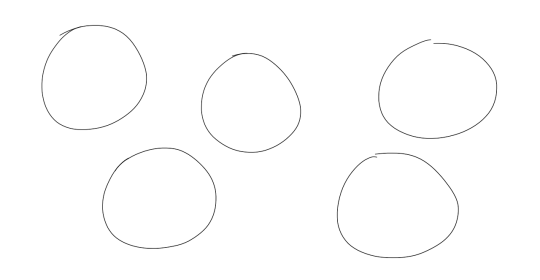
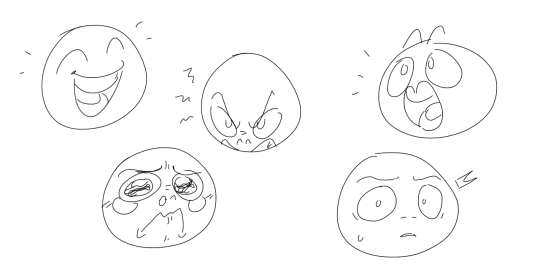
Now that you know some theory, it’s time to practice!
Fill a page with circles and fill them in with different expressions. Try and exaggerate as much as you can!
This is mostly for experimenting. They are quicker to draw than complete faces, but the same rules should apply!
And that’s about it!
I don’t know if I covered everything in this tutorial, since some things might be obvious for me, and this post perhaps only scratches the surface. So feel free to send me a message if you want an explanation about something more in depth! Thank you for reading! And now DRAW!!! ✨🎨
To create appeal and clarity in your figure drawing (or any character drawing), try to simplify an overall side of the body and to keep the details (limbs sticking out, face profile, body compression) to the other side. Your posing will becoming much more dynamic and interesting to look at, creating an organic asymmetry to the overall silhouette of the body. -Norm
Create more appealing hands on your character(s) by : -creating a line of action (appeal, simplicity) -grouping fingers as much as possible to simplify the shape -thinking of the overall silhouette to create a hand that’s as clear in its function as possible.
Last night, Paul Mendoza and I spoke to our animation class about the concept of “Simple vs Complex,” and I thought some of you might find this useful. The idea is to balance a strong pose by contrasting simple and contrast forms. The simple (stretching) side of a pose is usually your main line of action, while the complex (squashing) side is where you get most of the interest and the focal points of the pose. “Simple vs Complex” also works for individual parts like a flexing arm or a hand pose. This concept enhances clarity, appeal, and energy in any pose.
Bruce Timm’s style illustrates this concept best, but great actors (like the Python troupe) display this kind of posing all the time.


